Shopify Integration and Linking Products with Inventory & Templates
Learn how to connect your Shopify store with EZDZSEND and link your products to delivery templates and inventory for smooth automated digital delivery.
🎥 Prefer to watch the video?
Click here to watch the full Shopify integration guide.
Connect your Shopify store #
To get started, log in to EZDZSEND dashboard and open the Shopify integration section.
You will see two main tabs:
- Store List
- Product List
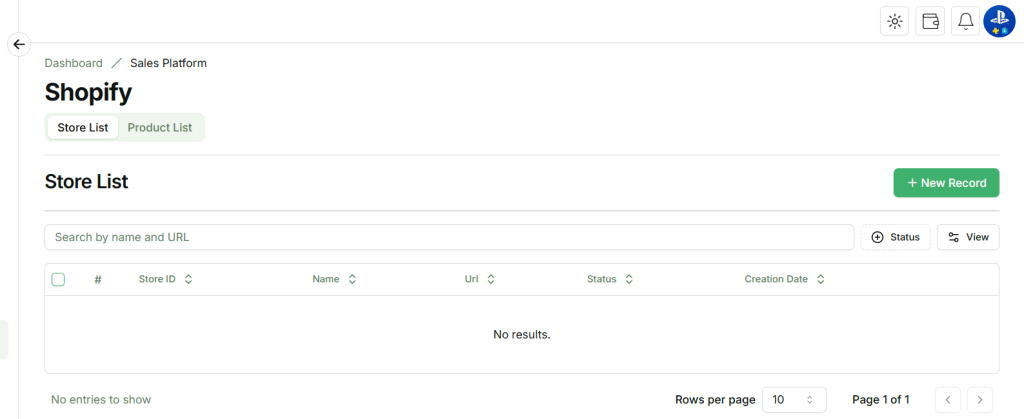
Add a New Shopify Store #
Inside the Store List tab, click the New Record button. A pop-up window named Add New Store will appear.
Fill in the following fields:
- Name → Store nickname (Example: “My Shopify Store”)
- URL → Your Shopify store URL (Example: https://your-store.myshopify.com)
Click Submit.
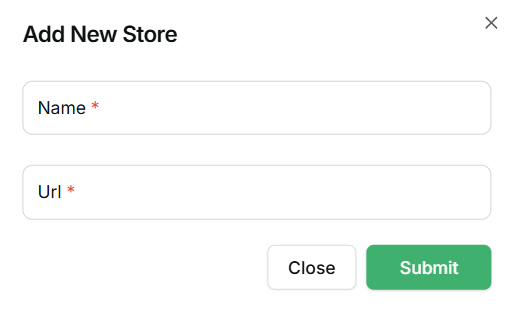
Displays the add new store modal.
Shopify will prompt to install EZDZSEND app
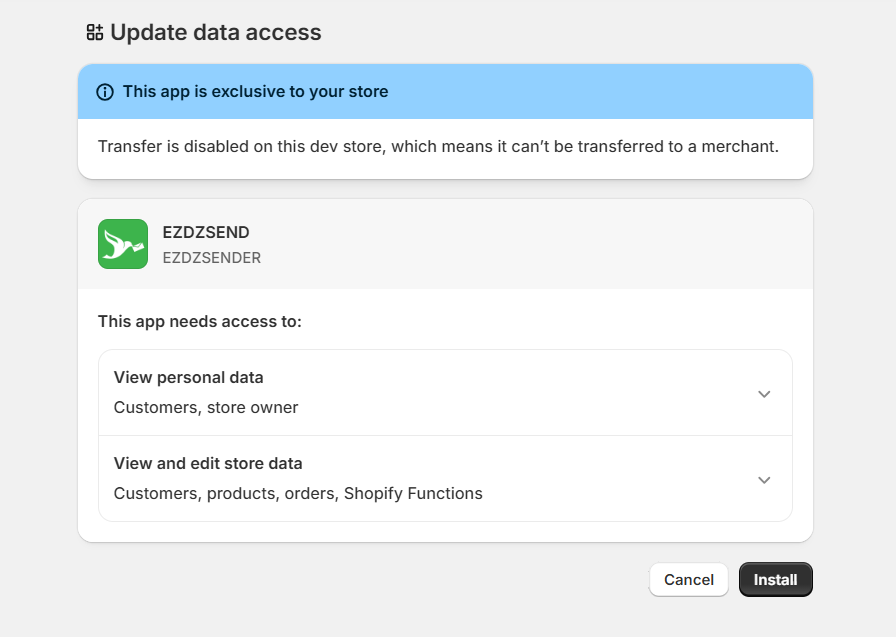
EZDZSEND App Installation – Connect Your Shopify Store Easily
- You are redirected to Shopify.
- If the Shopify store admin is not logged in, you will be prompted to log in.
- After login, Shopify opens the admin panel.
- Click Install app. Shopify will display a message:
- “This app is exclusive to your store”
- “Transfer is disabled on this dev store, which means it can’t be transferred to a merchant”
- EZDZSEND app appear. The app requests permissions:
- View personal data (Customers, store info)
- View and edit store data (Customers, products, orders, Shopify Functions)
- After installation, you are redirected back to EZDZSEND → Sales Platform → Shopify.
Shopify Store Table #
Once the store is connected and installed, it will appear in the Store List table with details such as:

Connected Shopify Store Displayed in Store List
Actions Column:
- Edit → Edit store info.
- Inactive / Active → Change store status.
- Reconnect Store → Sometimes, a connected store may have problems updating properly, such as:
- Expired access tokens
- Revoked permissions
- Webhook or API errors
- Temporary connection failures → In these cases, sellers don’t need to delete the store or do anything complicated. They can use the “Reconnect Store” option to quickly and safely reconnect it, so the store updates correctly again.
- Delete → Remove store (Deleting this store will also remove all related transactions and products.)
Product List Tab 🛒 #
Once a store is connected, all products appear in the Product List table:
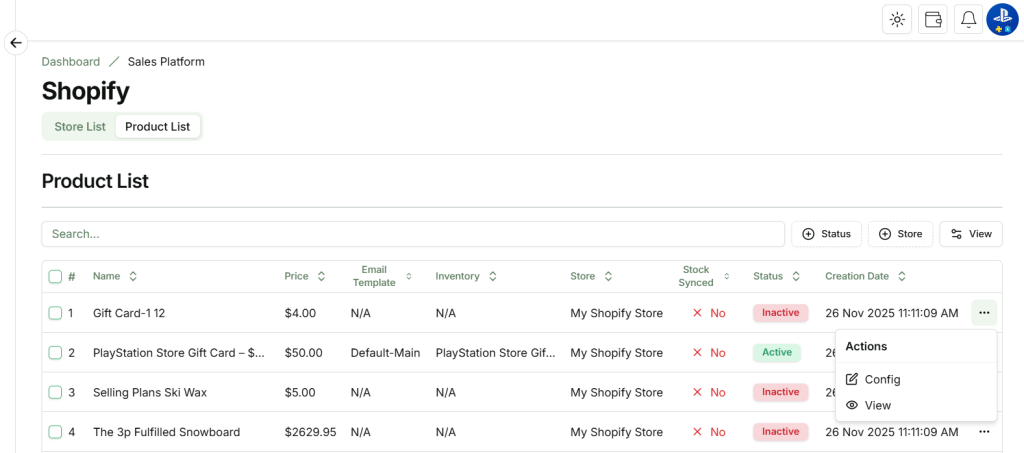
Imported Products from Shopify – Action Options Available.