The Inventory in the EZDZSEND platform is a centralized place where sellers can manage all their digital products. Sellers can add, organize, and control items such as game keys, software licenses, and gift cards. The Inventory allows sellers to track stock availability, view Inventory type, check creation date, manage files, and keep their digital catalog organized for easy access and smooth delivery.
Here Seller Can Do:
- Add New Inventory
- Edit Inventory
- Delete Inventory
- Inventory Setting
- View Codes
- Download ZIP
Add New Inventory #
To add a new product to your Inventory, follow these steps:
1. Navigate to the Inventory Page
From your seller dashboard, go to the Inventory section. Here, you will find a button labeled New Record.
2. Open the New Record Modal
Clicking New Record will open a modal where you can create a new inventory item.

3. Fill in Inventory Details
In the modal, provide the following information:
- Inventory Name – Give a name to your product.
- SKU – A unique identifier for your inventory item.
- Type – Select the type of digital product (game key, software license, gift card, etc.).

⚠️ Important: Either the Inventory Name or the Type must be unique. If the same combination of name and type already exists, you will not be able to add a new inventory item.
4. Inventory Creation
Once all conditions are satisfied and the required fields are filled correctly, the inventory item will be successfully created.
Understanding Code Settings
When creating inventory, you can choose how the codes or files are delivered to customers:
- Unique – Each code or file can be used only once per customer. This ensures that every customer receives a single, exclusive key or file.
- Recursive – Codes or files can be sent multiple times. This is useful for products that can be reused or sent repeatedly to different customers.
Once all required details are filled and conditions are met, the new inventory item will be created successfully. Understanding Unique and Recursive codes ensures proper delivery of digital products to customers. With this, the process of adding a new inventory item is complete.
Edit Inventory #
Sellers can update the details of existing inventory items using the Edit Inventory feature. To do this:
1. Locate the Inventory Item
From the Inventory list, find the product you want to edit.
2. Open the Action Menu
Click the action button (…) next to the inventory item. A popup menu will appear.
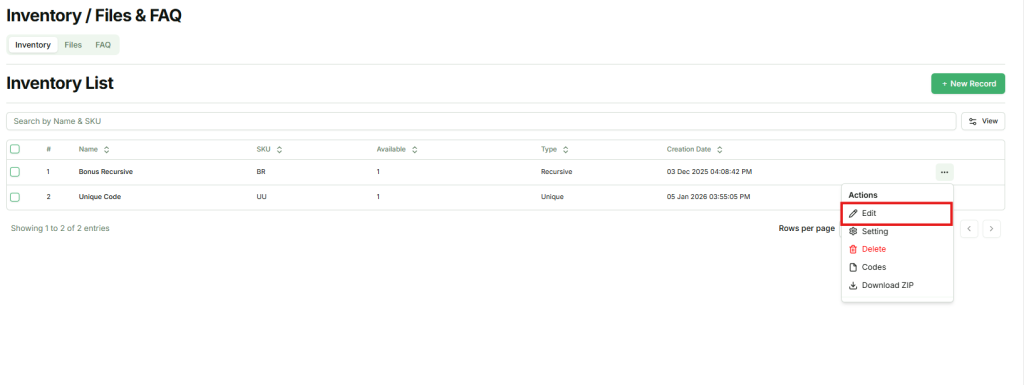
3. Select Edit
In the popup, click Edit. A modal will appear where you can update the inventory details.
4. Update Inventory Details
- Inventory Name – You can modify the name of the product.
- SKU – You can update the SKU associated with the item.
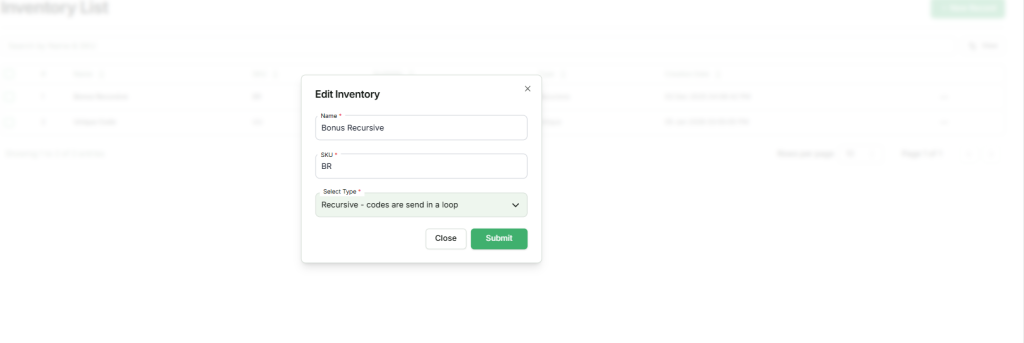
⚠️ Note: The Type of the inventory item cannot be changed once it is created. Only the Name and SKU are editable.
5. Save Changes
After updating the details, click Save to apply the changes. The inventory item will be updated and reflected in the list.
Once the necessary changes to the Name and SKU are made and saved, the inventory item will be updated successfully. This allows sellers to keep their digital catalog accurate and organized while maintaining the original product type.
Inventory Settings #
Sellers can configure how inventory items are delivered to customers using the Inventory Settings feature. To access it:
1. Locate the Inventory Item
From the Inventory list, find the product whose settings you want to configure.
2. Open the Action Menu
Click the action button (…) next to the inventory item. A popup menu will appear.
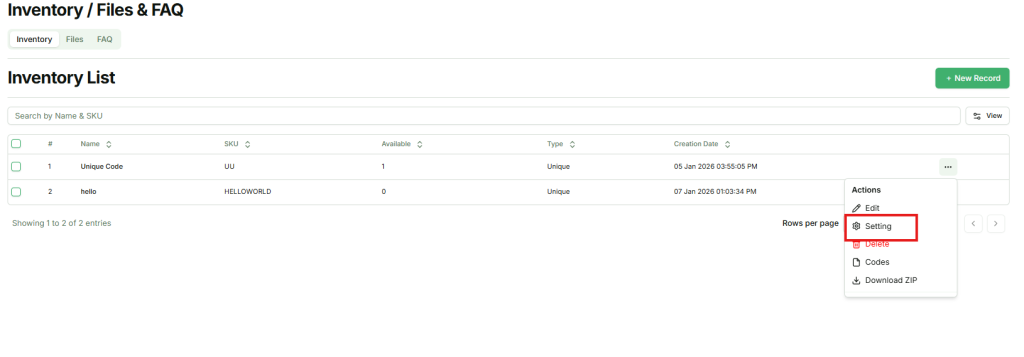
3. Select Settings
Click Settings in the popup. A modal will appear showing delivery options for the inventory item.
Delivery Options #
Sellers can toggle one option at a time:
- First In, First Out (FIFO) – Files or codes that were added first will be sent first.
- Last In, Last Out (LIFO) – Files or codes that were added last will be sent first.
- First Expired, First Out (FEFO) – Files or codes with the earliest expiration date will be sent first.
- Auto-Random – Files or codes will be sent in a random order.
✅ Note: Only one delivery method can be active for each inventory item at a time. Selecting a new option will override the previous one.
Delete Inventory #
Sellers can remove inventory items that are no longer needed using the Delete Inventory feature. To do this:
1. Locate the Inventory Item
From the Inventory list, find the product you want to delete.
2. Open the Action Menu
Click the action button (…) next to the inventory item. A popup menu will appear.
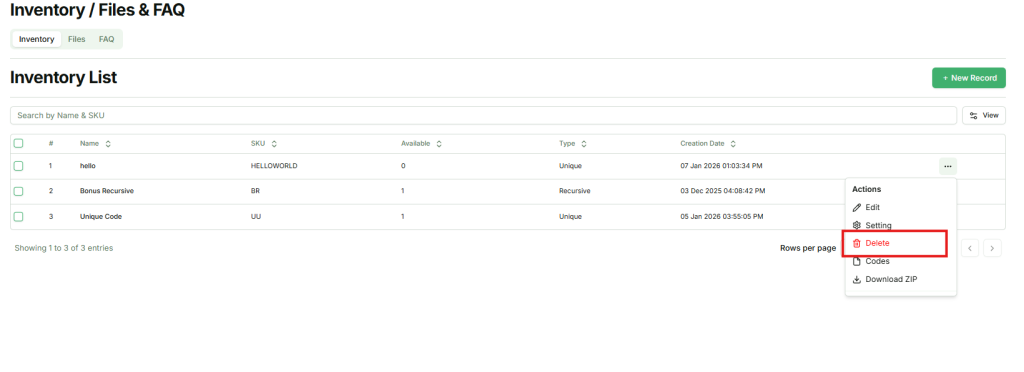
3. Select Delete
In the popup, click Delete. A confirmation modal will appear to ensure you want to proceed.
4. Confirm Deletion
Click Confirm in the modal. The inventory item will be permanently deleted.
⚠️ Note: Deleting an inventory item will also remove all files associated with it from the Inventory. This action cannot be undone.
View Codes #
Sellers can quickly access all files or codes associated with an inventory item using the Codes feature. To do this:
1. Locate the Inventory Item
From the Inventory list, find the product whose codes you want to view.
2. Open the Action Menu
Click the action button (…) next to the inventory item. A popup menu will appear.
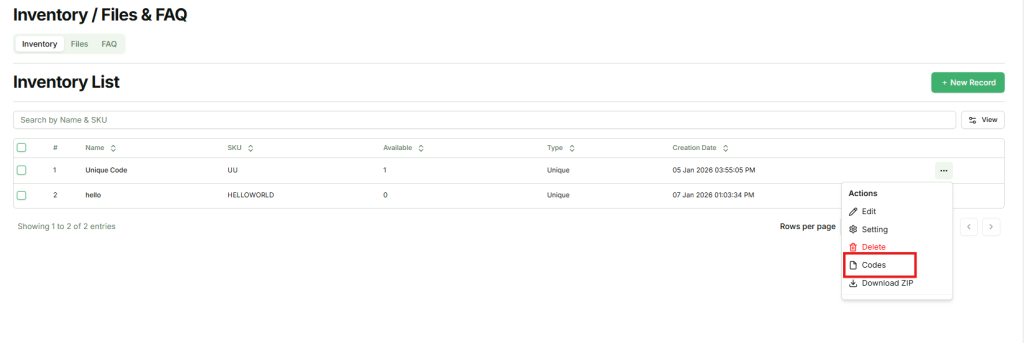
3. Select Codes
In the popup, click Codes. You will be redirected to the inventory files page for that item.
Here, sellers can view, manage, and download all codes or files associated with the inventory item efficiently.
Download ZIP #
Sellers can download all files associated with an inventory item as a single ZIP file for easy bulk management or backup. To do this:
1. Locate the Inventory Item
From the Inventory list, find the product whose files you want to download.
2. Open the Action Menu
Click the action button (…) next to the inventory item. A popup menu will appear.
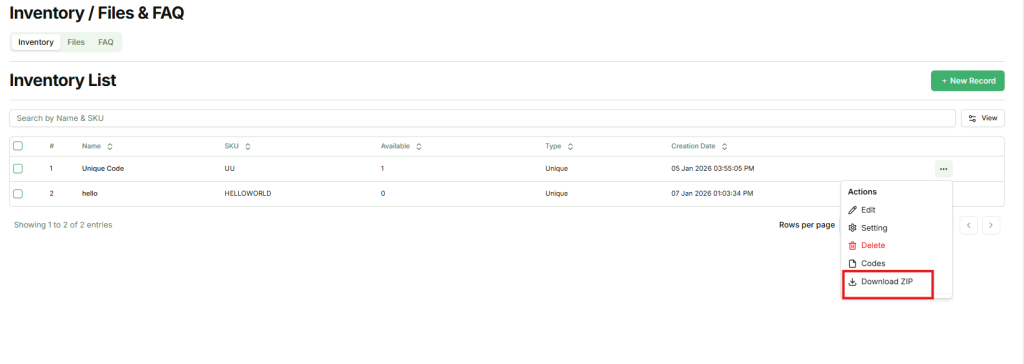
3. Select Download ZIP
In the popup, click Download ZIP. All files associated with that inventory item will be downloaded as a single ZIP file.
This feature makes it easy for sellers to manage multiple files at once without downloading them individually.