Sellers can manage all SMTP server configurations used for sending system and seller emails, including editing server details, testing email delivery, and ensuring reliable communication with customers.
Here Seller Can Do:
- Add new SMTP
- Edit SMTP
- Delete SMTP
- Activate or inactivate SMTP
- Filter Template records by:
- Status (Active / Inactive)
Add New SMTP #
To add a new SMTP to your SMTP list, follow these steps:
1. Navigate to the Settings
From your seller dashboard, go to the SMTP section. Here, you will find a button labeled New Record.
2. Open the New Record Modal
Clicking New Record will open a modal where you can add a new SMTP.

3. Fill in SMTP Details
In the modal, provide the following information:
- Name – Give a name for the SMTP server configuration.
- From to email – Enter the email address that will appear as the sender.
- Reply to email – Enter the email address where replies should be sent.
- Username – Provide the username for authenticating with the SMTP server.
- Password– Enter the password for the SMTP server account.
- Host – Specify the SMTP server host address.
- Port – Enter the port number used by the SMTP server.
- BCC – Add email addresses to receive blind carbon copy (BCC) of emails.
- Encryption – Select the encryption method (SSL or TLS) used for secure email transmission.
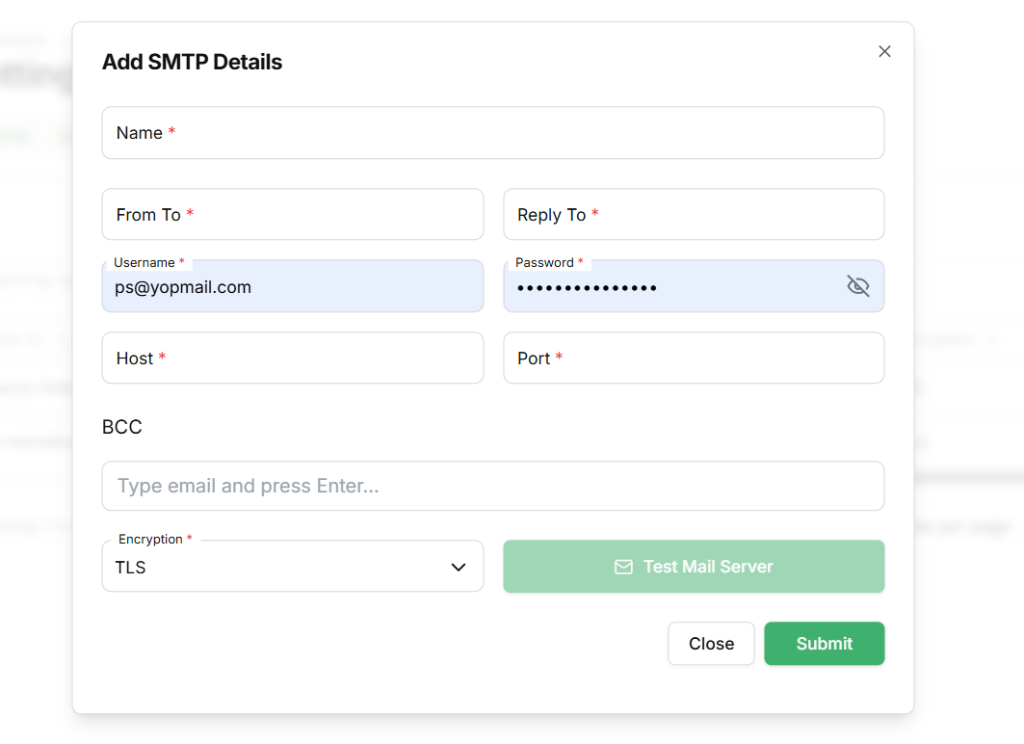
The Test Mail Server button is used to send a test email to verify the SMTP configuration and ensure that the added SMTP details are working correctly.
4.SMTP Added
Once all conditions are satisfied and the required fields are filled correctly, the SMTP will be successfully created, status active and available in Template configuration.
Edit SMTP #
Sellers can update the details of existing Template using the Edit Template feature. To do this:
1. Locate the SMTP
From the SMTP list, find the SMTP you want to edit.
2. Open the Action Menu
Click the action button (…) next to the SMTP. A popup menu will appear.
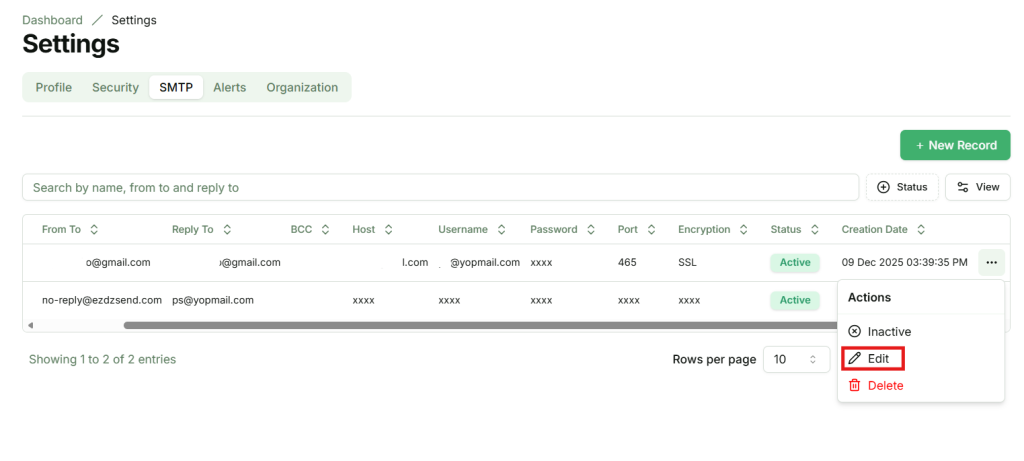
3. Select Edit
In the popup, click Edit. A modal will appear where you can update the SMTP details.
4. Edit SMTP Details
- Name – You can modify name for the SMTP server configuration.
- From to email – You can modify email address that will appear as the sender.
- Reply to email – You can modify email address where replies should be sent.
- Username – You can modify username for authenticating with the SMTP server.
- Password– You can modify password for the SMTP server account.
- Host – You can modify SMTP server host address.
- Port – You can modify port number used by the SMTP server.
- BCC – You can modify email addresses to receive blind carbon copy (BCC) of emails.
- Encryption – You can modify Select the encryption method (SSL or TLS) used for secure email transmission.
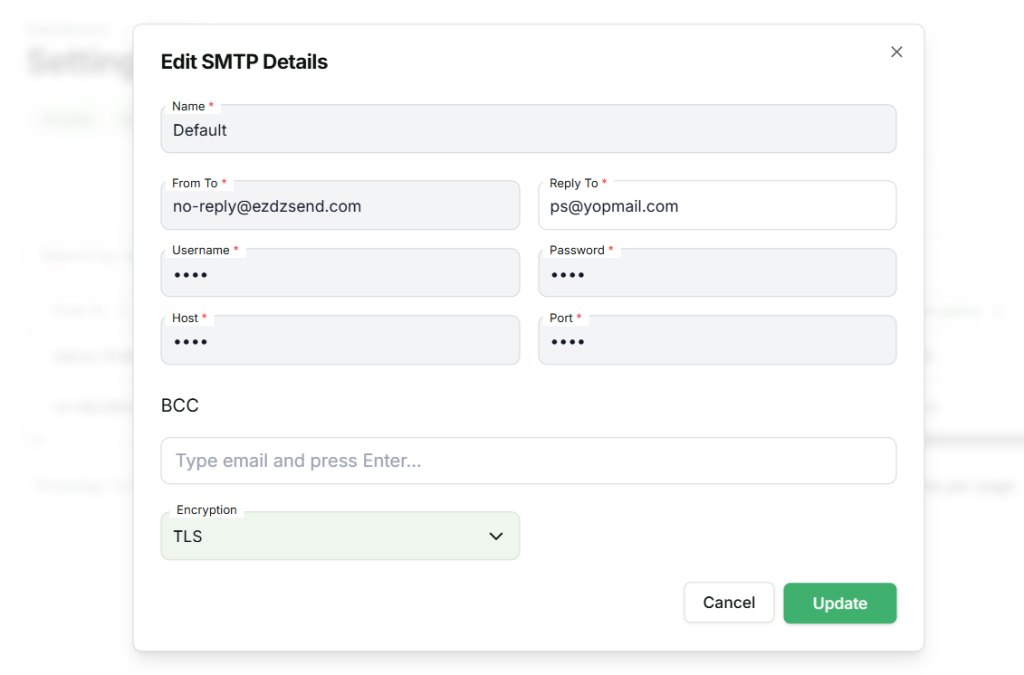
5. Save Changes
After updating the details, click Submit to apply the changes. The SMTP will be updated and reflected in the list.
Active or Inactive #
Sellers can activate or inactivate existing SMTP. Active smtp show in template configuration.
1. Locate the SMTP
From the SMTP list, find the SMTP you want to active or inactive.
2. Open the Action Menu
Click the action button (…) next to the SMTP. A popup menu will appear.

3. Select Inactive or active
In the popup, click Active or Inactive. A confirmation modal will appear to ensure you want to update it.
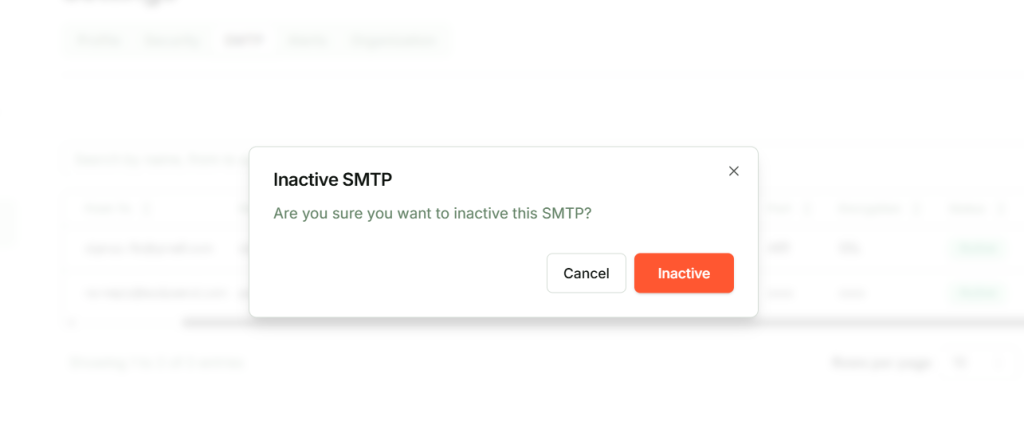
4. Confirm Active or Inactive
Click Confirm in the modal. The SMTP status will update.
Delete SMTP #
Sellers can permanently remove a SMTP from the SMTP List. Once deleted, the SMTP will no longer be available.
1. Locate the SMTP
From the SMTP list, find the SMTP you want to delete.
2. Open the Action Menu
Click the action button (…) next to the SMTP. A popup menu will appear.
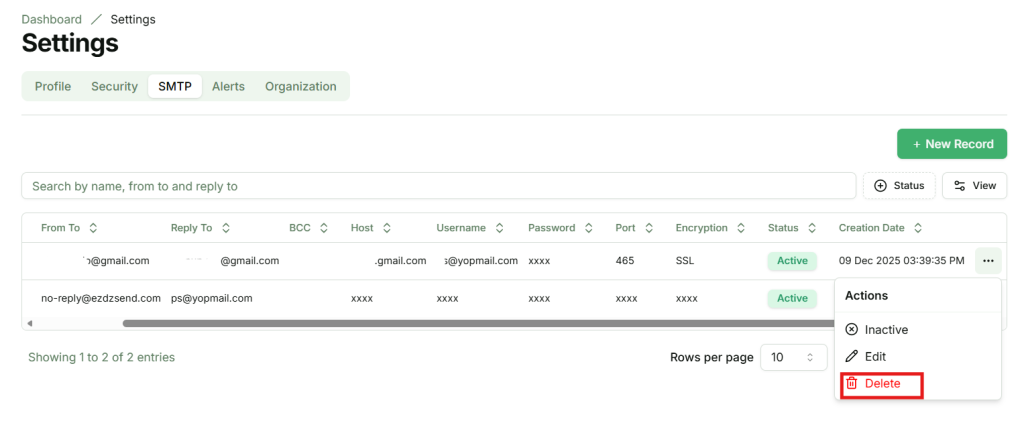
3. Select Delete
In the popup, click Delete. A confirmation modal will appear to ensure you want to proceed.
4. Confirm Deletion
Click Confirm in the modal. The SMTP will be permanently deleted.