
The Members page lets you add people to your EZDZSEND team and manage their access. Each member has a role that determines what they can see and do.
Go to Team → Members to open the page.
Members Overview #
At the top of the page, you can see:
- Member seats – How many member seats your plan includes and how many are in use.
- Active members – Members who can currently sign in.
- Login code on – Members who receive an email code when signing in.
The Members table shows each member’s Name, Email, Role, Status, 2FA, Last login, and Added on date. Use the search box to find a member by name, email, or role.
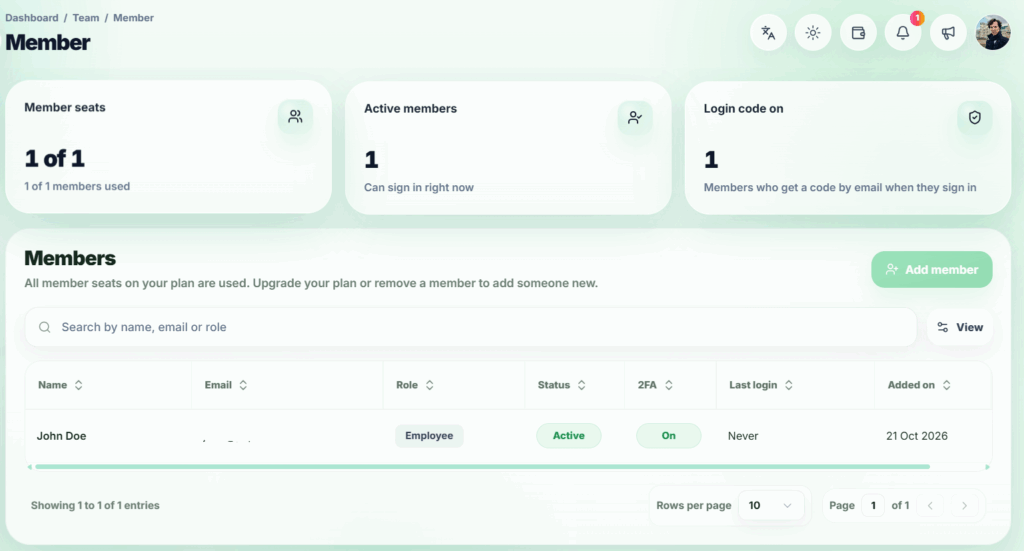
Member page with table
Add a Member #
You need an existing role before adding a member. Create one under Team → Roles & Permissions if the Role list is empty.
- Click Add member.
- Enter the member’s First name and Email. Last name is optional.
- Select a Role and click Send code.
- Ask the member for the 6-digit code sent to their email address.
- Enter the code and click Verify and add.
After verification, the member is added and their password is emailed to them. If the code expires or is unavailable, use Send a new code. The resend option becomes available after its countdown.
The Add member button is unavailable when all member seats on your plan are used. You can free a seat by removing a member or choose a plan with a higher member limit.
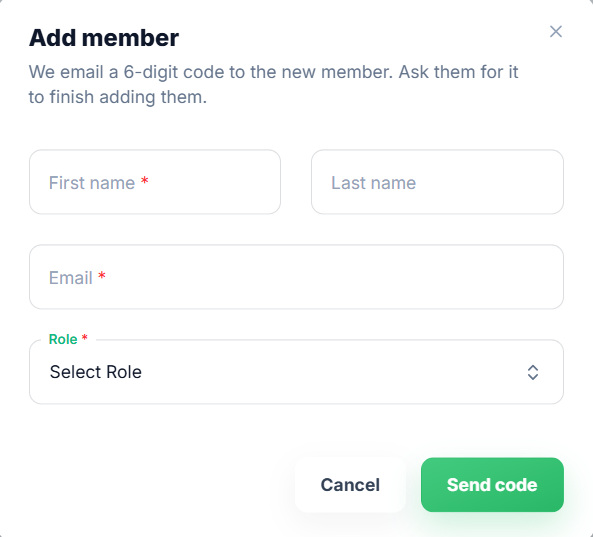
Add member modal
Manage a Member #
Open a member’s row action menu to:
- Change role – Assign another role. The new permissions apply on the member’s next action.
- Turn 2FA on/off – Control whether the member receives an email login code.
- Make inactive – Stop the member from signing in and end their current sessions.
- Make active – Allow an inactive member to sign in again.
- Remove – Remove the member and end their sessions. A removed member’s email address can be added again later.
Available actions depend on your permissions. Team members cannot use these actions on their own member row.